
FIRST MODEL CREATION
Exterior Train Model Prototype
I intended to make a metro style train car for the game however I had never created any vehicles before. I decided that I would just start modelling without any references and see what I could come up with and how difficult or easy the shapes were to work with.
I began with a box and firstly created the curve of the roof using the chamfer tool. After this i began working on windows, insetting to create frames before extruding inwards to create the indent of the windows. The entirety of the rest of the model was made using the extrude and inset tools.
The only parts i used a different tool for were the wheels. These were separate shapes which started as cylinders. I also used the inset and extrude tools to create a large amount of the shapes. I also used the bevel tool for certain parts of the wheels aswell.


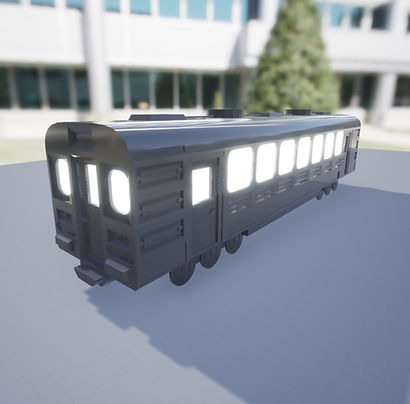
Exterior Train Model
I used the lessons that i learned from the first prototype that I made along with the use of a reference which can be seen below. I used the reference much less of a direct copy and more towards a prompt of what features to add and where to add them. I used this for the placement of the headlights, buffers and wheels for example.
This time however I used different techniques such as insetting significantly and then selecting the inset box and moving it with the select and move tool. I used this technique for the placement of the door handles and created the rest of the handle using extrude and inset.
The final model now includes passenger doors which were a significant addition that I realised I missed half way into the first prototype. These were created using insetting and extruding and also a chamfer for the curvature in the window edge.
I also used the chamfer tool in differing ways to create the curvature of the passenger windows and the front and rear windows. Lastly, I also used the bevel tool again to create details underneath these windows as well as a very small bevel on the front buffers.
I decided to detail the undercarriage too. This was largely unnecessary however I had the time to do it and I felt that it made the overall model look a lot better. It also gives me the opportunity to flip the train in a scene if i want to at any point. Having all sides of the model detailed just gave me a lot more freedom in what I could do with it.
The undercarriage is almost entirely created using insetting, select and move and extruding. The large axels and poles were created with separate shapes using cylinders.
The wheels are also all separate shapes. I used most of the techniques i learned on the prototype as well as more use of the bevel tool.
Lastly the air vents and piping on top are also separate objects. Each vent however is a single object. To create the fans i first created a cylinder, i then inset and extruded inwards to create a bowl shape. I then created another inset at the bottom and extruded the remaining circle outwards to create the support for the fans. Finally, i selected every other poly which made up the inner ring and extruded them inwards towards the fan support. This created an effect of fan blades.


Fuse box Mechanic & Interior
I created a fuse box in 3Ds Max, starting with a box and began insetting and extruding to create the basic shapes. The end result can be seen on the left. The entire grey object is a single asset and there are no other objects grouped with it. The yellow object is a simple fuse that I created with the players will need to collect and put them in the box in order to progress.
To make the fuse box asset I used the chamfer a lot. I used it to create the pipes, buttons and hinges which the door pivots on. The door can be seen in the images. It's a simple box which is just under the same width and height of the fuse box. I also created a handle using the inset and extrude tools. I did this by insetting and then using the move and resize tool to create the shapes within the poly and then extrude it to create the handle.
To set the pivot in Unreal Engine 4 for the door I simple exported the door aligning the left edge with the centre of the grid. This ensured that when I imported it into the engine it would already rotate around the correct spot to be animated.
The blueprint to setup the door opening was relatively simple to setup. It consists a trigger (When the player walks into the box) which begins a timeline. This timeline controls the animation and speed the door opens. To have the timeline apply it's effects i ended the blueprint with an "AddWorldRotation" block. I split the struct on the axis to specify just the Y axis in the animation.

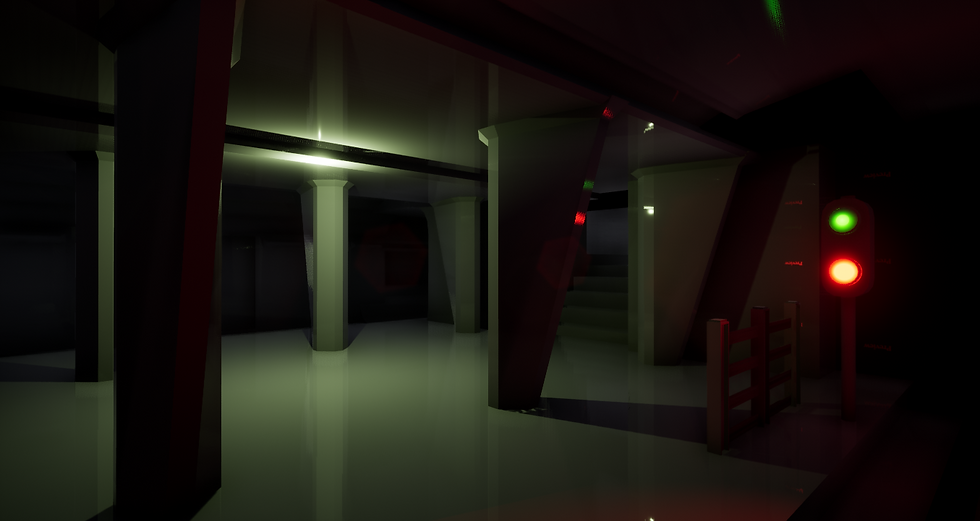
INTERIOR


Train Interior started
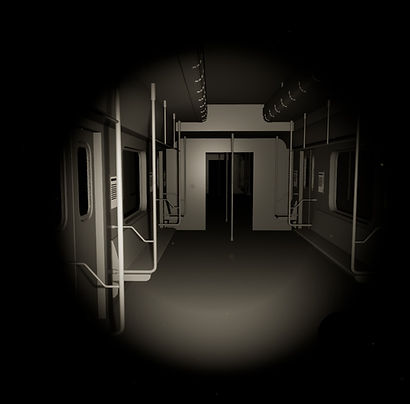
The interior consists of two halves of each side of the train, as well as light fixtures and cylinders with an emissive light texture applied to it which i created. The interior model is a downloaded model which I have added to (in the form of light fixtures, fuse boxes and posters. This gives the effect of a powered light and when combined with point lights works well with the scene. The use of a separate object for the emissive light was intentional so that i could create rooms where they weren't in place and could better create a darker environment with "non-powered" lights.
In the second picture you can see the fuse box and door mentioned above in the scene. They fit well in the scene and the scale was almost perfect after importing from 3Ds max. I encountered an issue with the timeline creation which made the door open. I hadn't used timelines in a while and because of the type that I used I had to play with the value until i got it to open to the correct amount.
My next steps will be to begin creating the blueprint system which manages the collection of the fuses, the input of the collected fuses. and any proceeding events which are triggered directly by the completion of the fuse "puzzle".
Link to the original interior model can be found here.


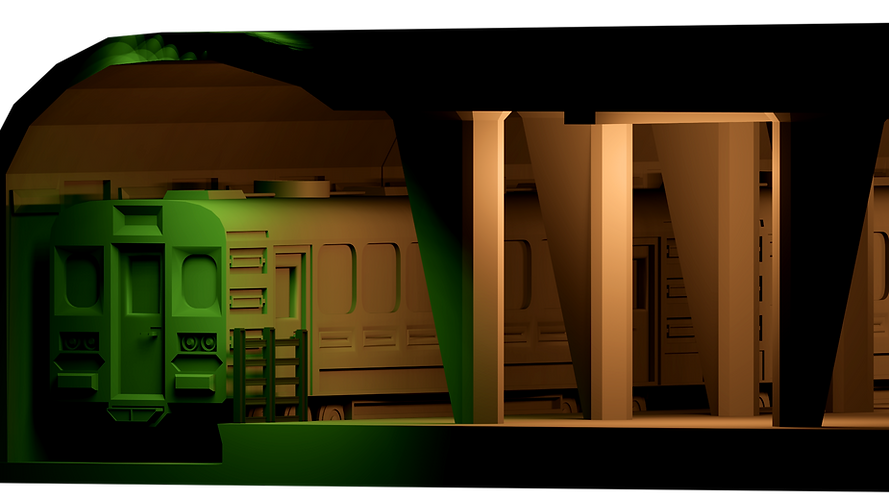
LOD Model Optimisation
I decided to create an LOD (Level of detail) change for the subway train model due to its high poly count. Just over 30,000 triangles. In order to do this I first opened the model settings and navigated to LOD Settings. I changed the group from none to HighDetail to enable the rest of the settings. I then set the number of LODs to 8 to maximise smoothness between transitioning and ensured that the LOD distance was set to auto compute. The result leaves me with a model which decreases in detail the further away you are. By default the model will stay at its highest LOD which, if this level were to be a full game would significantly damage performance if all of the models were processing at their maximum detail at all ranges.
Though largely an unnecessary change, I wanted to enable and edit the setting for my final project in order to better show my knowledge and understanding in what I'm working on.
Top right: Subway model at it's highest level of detail (LOD 0)
Bottom right: Subway model at a lower level of detail (LOD 3)
BLUEPRINTS


Player Teleport & Light flicker
I created two one time use blueprints. These are just events that occur throughout the level. The first is a simple teleport blueprint (Top left.) It's used to teleport the player from the platform into a black box before moving them into the interior train.
Originally i experimented with them being teleported directly into the train however the transition felt very harsh. To counter this i teleport them into a black room with no lights for a few moments before moving them into the interior. Because of this the blueprint uses two teleport functions with a delay in-between. The target is the same for both so i was able to use the same node to connect to both.
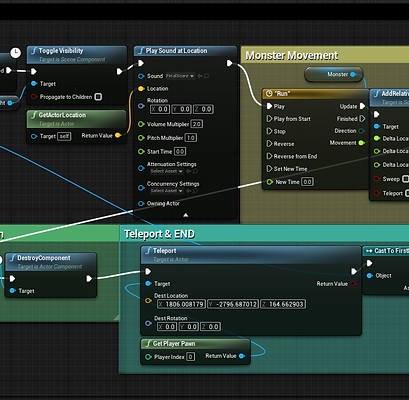
I also created a light flicker event when the player enters one of the carriages. (Bottom left)This was something that would only occur once. It's a large yet very simple blueprint. It simply consists of a trigger, a "Do Once" node to prevent it from being retriggered and a series of delays and "Toggle visibility nodes which are each independently connected to 3 point lights. The starting visibility is off when the player enters and the blueprint toggles it several times at varying intervals in order to create a flicker effect.
There is likely an easier way to do this effect however I had used something similar to this that i taught myself in a previous project and it worked well without any issues so I decided to use it again.

Environmental Animations
I created several new environmental animations. The first is a very simple blueprint consisting of a timeline and a movement node. This simply moves a train model past the character at a high speed simulating a fast train passing them in the opposite direction.
I also created a basic door using the same techniques. This door is comparable to doors found within the Halo franchise, where within a certain range of the door it automatically opens. It made sense to make a door like this as it fits into the theme and location of a subway train.
(Click image to enlarge)
Door feature (Non locked)

I created a simple door system which when the player gets close enough, the sliding doors open and a sound effect plays. It's a really simple blueprint and just uses some timelines and a "Do Once" node to ensure that the doors don't move more than once and the sound only plays one time.
I could have made it so that when the player leaves the box, it waits a few moments before closing the door however I didn't feel it was a necessary addition and might confuse the player in making them feel they could only go forwards.
The blueprint can be seen on the left. (Click to enlarge)

Fusebox System
The fuse box system consists of a more advanced door system, as well as a Boolean requirement. This Boolean is set in a different blueprint. When the player picks up the fuse it sets the Boolean to true which then permits the rest of this blueprint to run. Once the fuse has been placed in the box, it appears in the fuse box, and the doors open.
In the fuse blueprint, the item can be "picked up" (Destroyed & the Boolean updated). This then adds a widget to the bottom right of the screen displaying the fuse. It also updates the objective too.
The blueprint can be seen on the left. (Click to enlarge)
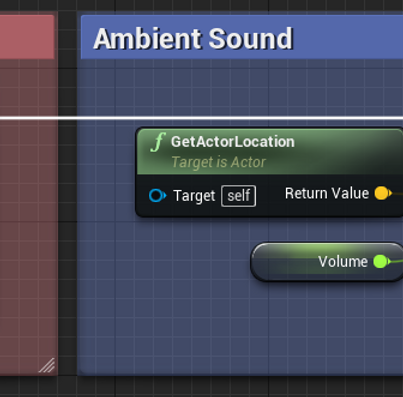
In-game sound
Sounds were implemented very simply, To any blueprint that needed sounds I simply used a "PlaySoundAtLocation" node and got the player location and used that. An exception to this was the passing train which played the sound relative to the train location to make it sound like it was moving.
To create the ambience, I set the sound that I was using to loop within the sound settings. This was used for both the overall ambience and the sound of the train moving when you're inside.
Credits and a full list of sounds used can be found here in the bibliography.
The blueprints can be seen on the left. (Click to enlarge)
Flashlight Feature
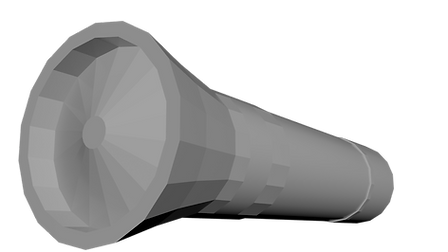
I initially created a simple flashlight feature, which upon pressing F would toggle the visibility of a spotlight attached to the player camera. (So that the light would follow where the player looked.)
I wasn't happy with it though and wanted to make it a little more advanced. Firstly i created a simple flashlight model which would be used. I then also attatched this to the player camera and positioned it correctly. I then did the same for the flashlight as i had for the spotlight which when F was pressed; the spotlight and flashlight would either appear or disappear.
This felt very rough and I didn't like it. So i decided to animate the flashlight raising, lowering, as well as adding an idle animation along with animation whilst the player was walking. I also decided that when the player would turn the flashlight on that the light would flicker before staying on. I made sure that when the player would turn the flashlight off it would not do this.
A problem that I encountered was that the spotlight would flicker rapidly causing a strobe effect as it was turned on. This was because the rest of the blueprint was trying to play whilst the timeline was still being run. In order to fix this I added a delay after the AddRelativeLocation node on the A side of the flip flop of 1 second. This would ensure the rest of the code would wait the length of the timeline and an additional 0.5 seconds before turning on the flashlight.
This fixed the issue and the feature works well. When I press F, the flashlight will raise up and the light will flicker on. When I press F again, the light will turn off first, and the flashlight will lower out of sight.


SOUND
Footsteps
The footsteps were quite easy to make. I didn't want them to be too repetitive so I made sure I had multiple sound effects. Unfortunately the surface of the footsteps sound like mud, rather than a harder surface which would have been more suitable.
I had 3 different sound effects for the footsteps. I created a very simple sound blueprint which would randomise which it would choose, and I added in points throughout the animation timeline of the character walking that the sounds would play. This ensured that the footsteps played at the right times.
The blueprint can be seen on the left. (Click to enlarge)

CREATURE
Monster Model & Jump-scares
I downloaded a free model from Sketchfab to use as the monster within the level. The model was created by "Shedmon" and can be found here. I used the model in 3 Instances. 2 Full "Jump-scares" and a more subtle moment where the monster peaks round the corner and moves away when the player gets close. The first full jump-scare consisted of a lighting event as well as the monster spawning in for a brief moment before being hidden again. The lights would go from being on their usual colour, to red as the monster shows and completely off once it disappears. This also played a sound effect too. I felt this was the perfect moment to introduce the flashlight mechanic and added an objective tip to show them the button.
The final jump-scare is my least favourite. It consists of a light behind a monster which spawns in order to create more contrast and visibility for it, as well as an animation of the monster rapidly moving forward and a long roaring sound effect. The player then gets teleported to a black room before a text appears on the screen.
Top Left: Monster (Click to see original model @ Sketchfab)
Bottom Left: Final scare blueprint (Click to enlarge)


MECHANICS
Zoom Mechanics
I created a simple zoom mechanic to help the player see some of the smaller details, such as the fuse and fusebox. It was an incredibly easy blueprint to create. I simply created a new input which in this case was the "C" key. Created a timeline which was a straight line changing from 0 to 45 and attatched the set FOV node with the target being the player camera. Then to make it function i simply linked the pressed and released points from the input to the Play and reverse points on the timeline. The blueprint worked seamlessly and I tried to break it in-game by rapidly pressing the C button however it simply wouldn't break.
The blueprint can be seen on the left. (Click to enlarge)
OBJECTIVES
Widgets (Objective system)
I created an objective system which was relatively easy to do. Essentially, upon walking into a box it sets a string variable which is then sent and put into a box on the top left of the screen and displayed as an "objective". The variable is set to Instance Editable which allows me to place the blueprint down but change the string each time.
Once the objective is added the box is destroyed so it can't be re-added. Lastly a sound is played to give an audio que that an objective has been added.
The blueprint can be seen on the left. (Click to enlarge)